Learn how to create a public link that will allow you to recruit & track program applicants on ApprentiScope.
User Types: Regulators, Sponsors & Employer Administrators
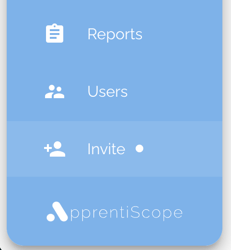
Step 1: Navigate to the INVITE page on the Navigation Bar

Step 2: Click the PUBLIC LINKS tab and then CREATE LINK +
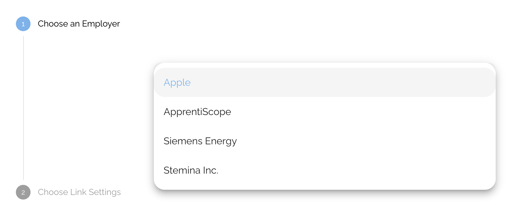
Step 3: Select the Employer linked to the program being posted and click Continue
- Note: Choose the Sponsoring Organization as the Employer if creating a link for a general application rather than a specific program posting.

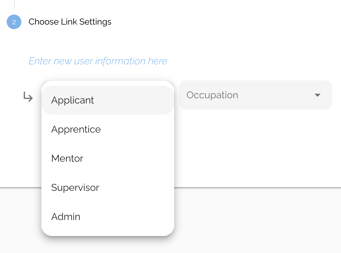
Step 4: Choose the Link Settings by selecting APPLICANT as the User Type & the OCCUPATION/PROGRAM being posted & click CREATE LINK

Note: By default, your posting will be created with the pre-set description below, pulling in the employer and occupation/program you selected. Below is the default posting applicants will see when you provide them the link.
Step 5: To Provide the Public Link to Potential Applicants with its Pre-Set Language, use one of the options below.
- Click the Link Icon to Copy the URL for sharing this posting on the internet or with individuals/groups
- Click the QR Code Icon to download the QR Code for use on signage in the physical world
- Click the Double Arrow Icon to copy the HTML snippet to embed the posting on your website

- To provide applicants with a Job Openings list for all you programs/employers and links to apply to them, click "View Job Board" and then copy the page's URL & add it to any website or location you like.


When applicants click the APPLY NOW button on the posting, they will be taken to ApprentiScope to create their account (see screenshots below). By default, the account creation process requires applicants to:
- enter the personal information and RAPIDS demographics, and
- create an ApprentiScope password.
- Note: You can also include additional questions if you create a Custom Dataset and add it to this process. See Step 7 (below), such questions would be asked after the question below but before the password section of the Account Creation process.
Note: See Step 6 below to edit your posting and what information is requested.

Step 6: To edit the pre-set public link and other settings for the posting, click its Title on the Public Links page or the 3 Vertical Dots to the far right of the Title.


Edit Content: You can change the Title, Location, Employer, Description, and Logo.
- Note: If you change the Description, the only pre-set language (noted above) that will remain is the sentence below, which will appear after your self-written text. If you want the full pre-set language along with your self-written text, be sure to copy the pre-set language to paste in the description along with your own text.
- To add unique formatting (bold, paragraphs, spacing, etc) in customized descriptions, you will need to use HTML codes. Here are a couple frequently used codes:
- Add a paragraph or space between lines: <br>
- Bold font: <strong> both before text to be bolded and </strong> after the text to be bolded
- This sentence will always remain at the bottom of the description: "If you have technical questions about ApprentiScope, visit Support Center to find solutions and connect with our Support Team."
Note: If you want your employer logo to display instead of ApprentiScope's logo, follow the steps here.

Edit Settings: Blue means the setting is turn ON
- RAPIDS Dataset - When applicants click the APPLY NOW button on the posting, they will be taken to ApprentiScope to create their account. As part of that account creation process, they are by default required to provide basic personal and RAPIDS demographic data. Click this OFF if you do not want demographics data collected.
- Hide Social Security Numbers - Toggle this setting ON, if you want applicants to be required to provide their SSN
- Public - You can set your posting to appear on ApprentiScope's public Jobs Board on its webpage if you click the last setting - PUBLIC.
- To view the ApprentiScope Jobs board, click ApprentiScope Jobs
- Learn more about the ApprentiScope Jobs board here.

Step 7: Collect Additional Information from Applicants (opt)
- Set up an Application Checklist - Once an applicant creates their ApprentiScope account, you can provide them with a Checklist of prerequisites - tasks they must complete, documentation they must upload to ApprentiScope, additional data tehy must provide - before their application will be considered. Read this article to learn how to set up an Application Checklist.
- Add Custom Data Fields to the Account Creation Process - If you'd like to capture more data during the account creation process (example - data required or related to grants or custom/supplemental data needed for your application process), speak with your Customer Success Manager.
If you have questions or need help, please submit a Support Ticket here.


