Learn how to create a wage schedule for your program that will trigger participant wage eligibility alerts and auto-populate apprentice agreements and other reports.
User Types: Regulators, Sponsors & Employer Administrators
Notes:
- For each occupation, the initial wage schedule you set is considered the Default wage schedule. All apprentices are automatically assigned this wage schedule unless you create multiple wage versions and assign them to the appropriate participants.
- You can set a wage step to increase the wage to $0. Some clients do this so they can track Wage steps but not actual wage amounts. However, if you are using ApprentiScope apprentice agreements, you will need to enter the wage amounts so that the agreement information can be properly auto-filled.
Step 1: Click Occupations and then click the program you need to create a wage schedule for.

Step 2: On the program's Occupation Details page - General tab, click the blue ADD WAGES+ button.

Step 3: Set the wage schedule information
- Required fields include:
- Schedule Type
- Rate Type
- Step 1 Entry Wage
- Last Step Journey Worker Wage
- At least 1 Wage Step
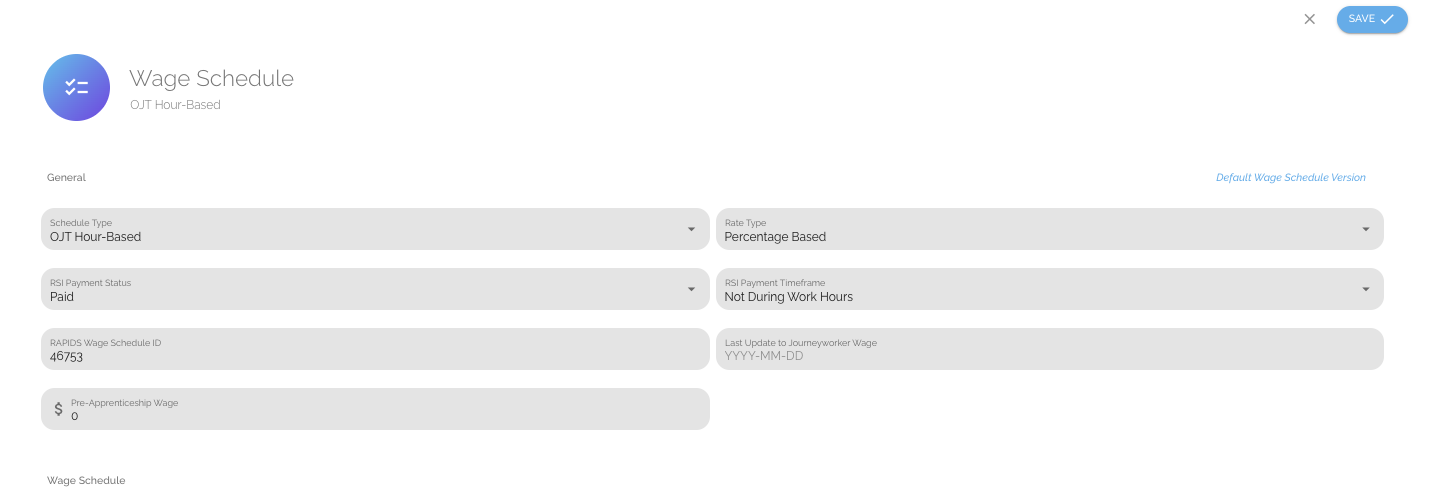
- Schedule Type - Indicates the type of information on which the wage trigger, notifying you that an apprentice is potentially eligible for a wage increase, will occur. If you select a month-based schedule, please note that the Program Start Date field for each participant must be input in order for the Wage Schedules to function.
- Rate Type - Indicates whether any wage increases will be set as a set dollar amount or a percentage of the journey worker wage.
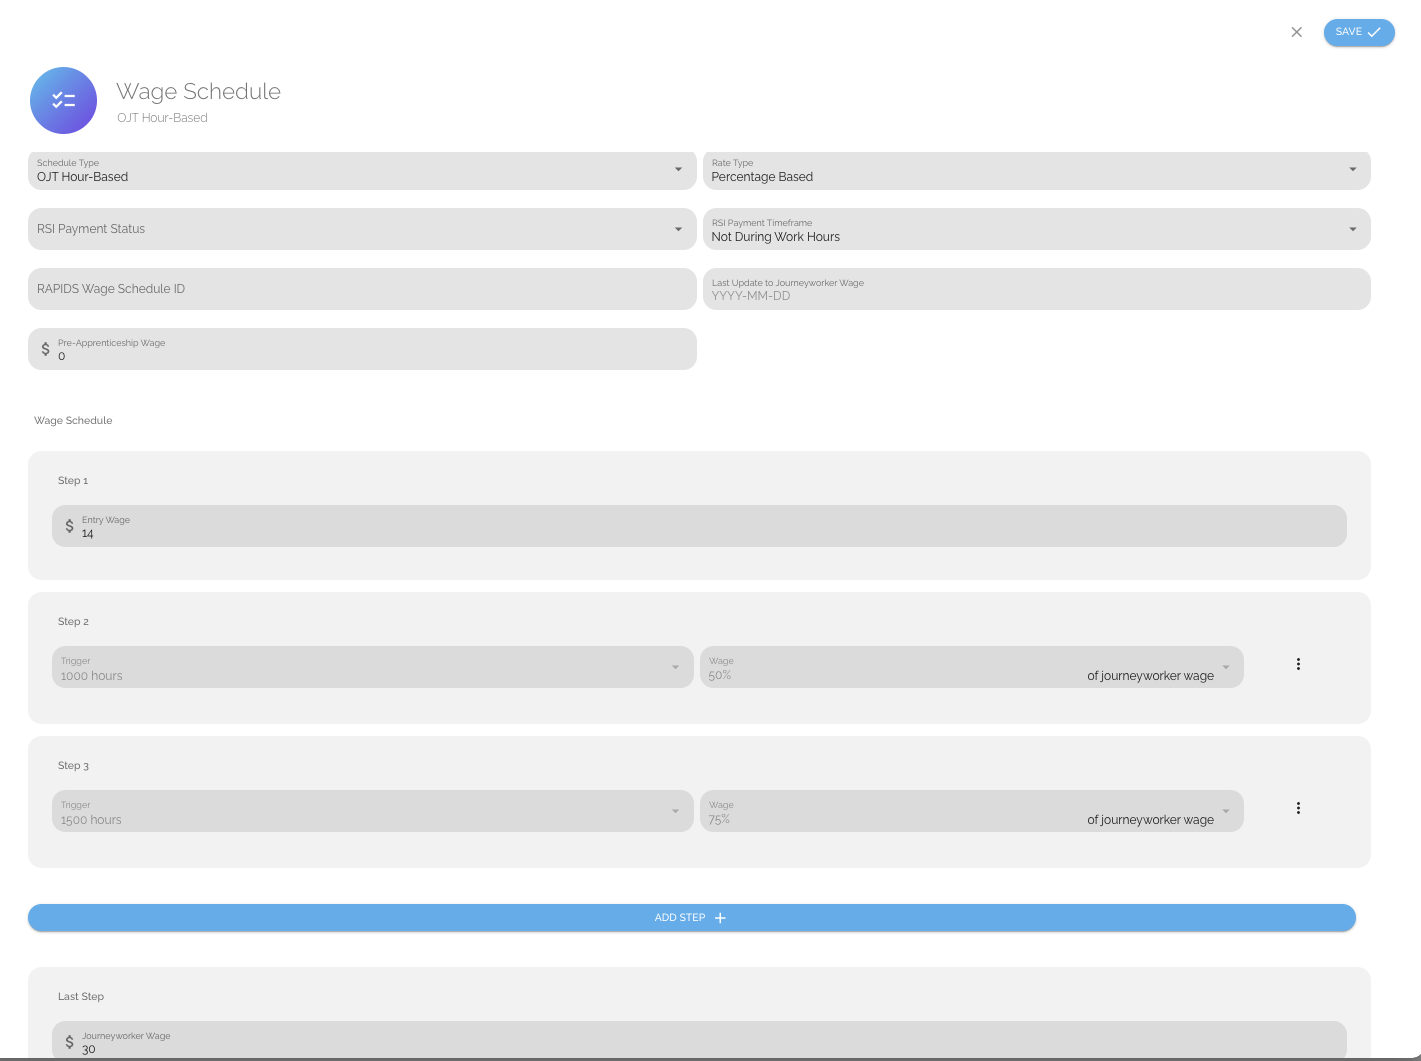
- Wage Step - To add a wage step, click the Add Wage Step + button and then select or type the appropriate level (ex 1000 hours) and input the wage increase (dollar amount or % of journey worker wage).
- Note: Apprentices will always begin by receiving the program's Entry Wage as Step 1. Apprentices will then be eligible for wage increases based on the additional Steps you set.
- We also recommend inputting the RAPIDS Wage Schedule ID for registered apprenticeships. This will help with additional form functions on ApprentiScope that you may want to use later.

- Example: Schedule Settings = Schedule Type - OJT Hour Based; Rate Type - Percentage Based; Step 1 Entry - $14; Added Wage Step - Step 2 - 50% of journey worker Wage; Last Step Journey Worker Wage - $30
- With the example settings above, a new apprentice would show in the system with an entry and current wage of $14.
- Once they submit 1000 OJT hours, the system will trigger a wage notice that the apprentice is eligible for an increase to $15 (50% of $30 journey worker wage). which you ca approve or deny.
- Once they submit an additional 1500 hours (so 2500 hours in total), the system will trigger a wage notice that the apprentice is eligible for an increase to $22.50 (75% of $30 journey worker wage). which you ca approve or deny.
Step 3 (optional): Click ADD VERSION + to enter additional wage schedules for the same occupation.
- You will be able to name any additional wage schedule versions to allow you to easily assign apprentices to those non-default versions.
- To assign an apprentice a non-default version, open that apprentice's profile details - general tab, edit the Wage Schedule field by clicking the edit/pencil icon in the box, select the correct schedule from the drop down, and click Save. By default, it will show the Default Wage Schedule.
Step 4: Click on Activity-Wages to see all participants eligible for a wage increase and approve, deny or comment on the increase.
Note: If you set up Wage Schedules after participants have been tracking progress in the platform and you do not see anyone on the Wages page, please contact your Customer Success Manager. You may need to advance wage schedules to bring all participants to an appropriate starting point.

If you have questions or need help, please submit a Support Ticket here.

